Sharing and Publishing
FormVox offers flexible options for sharing your forms with others.
Sharing Methods
Share with Nextcloud Users
Share forms with specific Nextcloud users or groups:
- Open your form
- Click the Share button in the toolbar
- Search for users or groups
- Set permissions:
- View - Can view the form and submit responses
- Edit - Can modify the form structure
- Manage - Full access including sharing
Public Links
Create a link that anyone can access:
- Open your form
- Click Share → Public link
- Configure options (see below)
- Copy the link
Public Link Options
Password Protection
Require a password to access the form:
- Enable Password protection
- Enter a password
- Share the password separately with intended respondents
Expiration Date
Set a deadline for form access:
- Enable Expiration date
- Choose a date and time
- After expiration, the link returns an error
User/Group Restrictions
Limit who can access a public form:
- Enable Restrict access
- Select Nextcloud users or groups
- Only these users can submit responses (they must log in)
This is useful for: - Internal surveys that need a public-style interface - Collecting responses from specific departments
Embedding Forms
One of FormVox's most flexible features is the ability to embed forms directly into any website or platform that supports HTML. This means your forms can live exactly where your users already are — no need to redirect them to a separate page.
FormVox forms can be embedded in: - Microsoft SharePoint sites and pages - Company intranets and portals - WordPress, Drupal, or any CMS - Static websites and landing pages - Learning management systems (LMS) - Any platform that supports iframe embedding
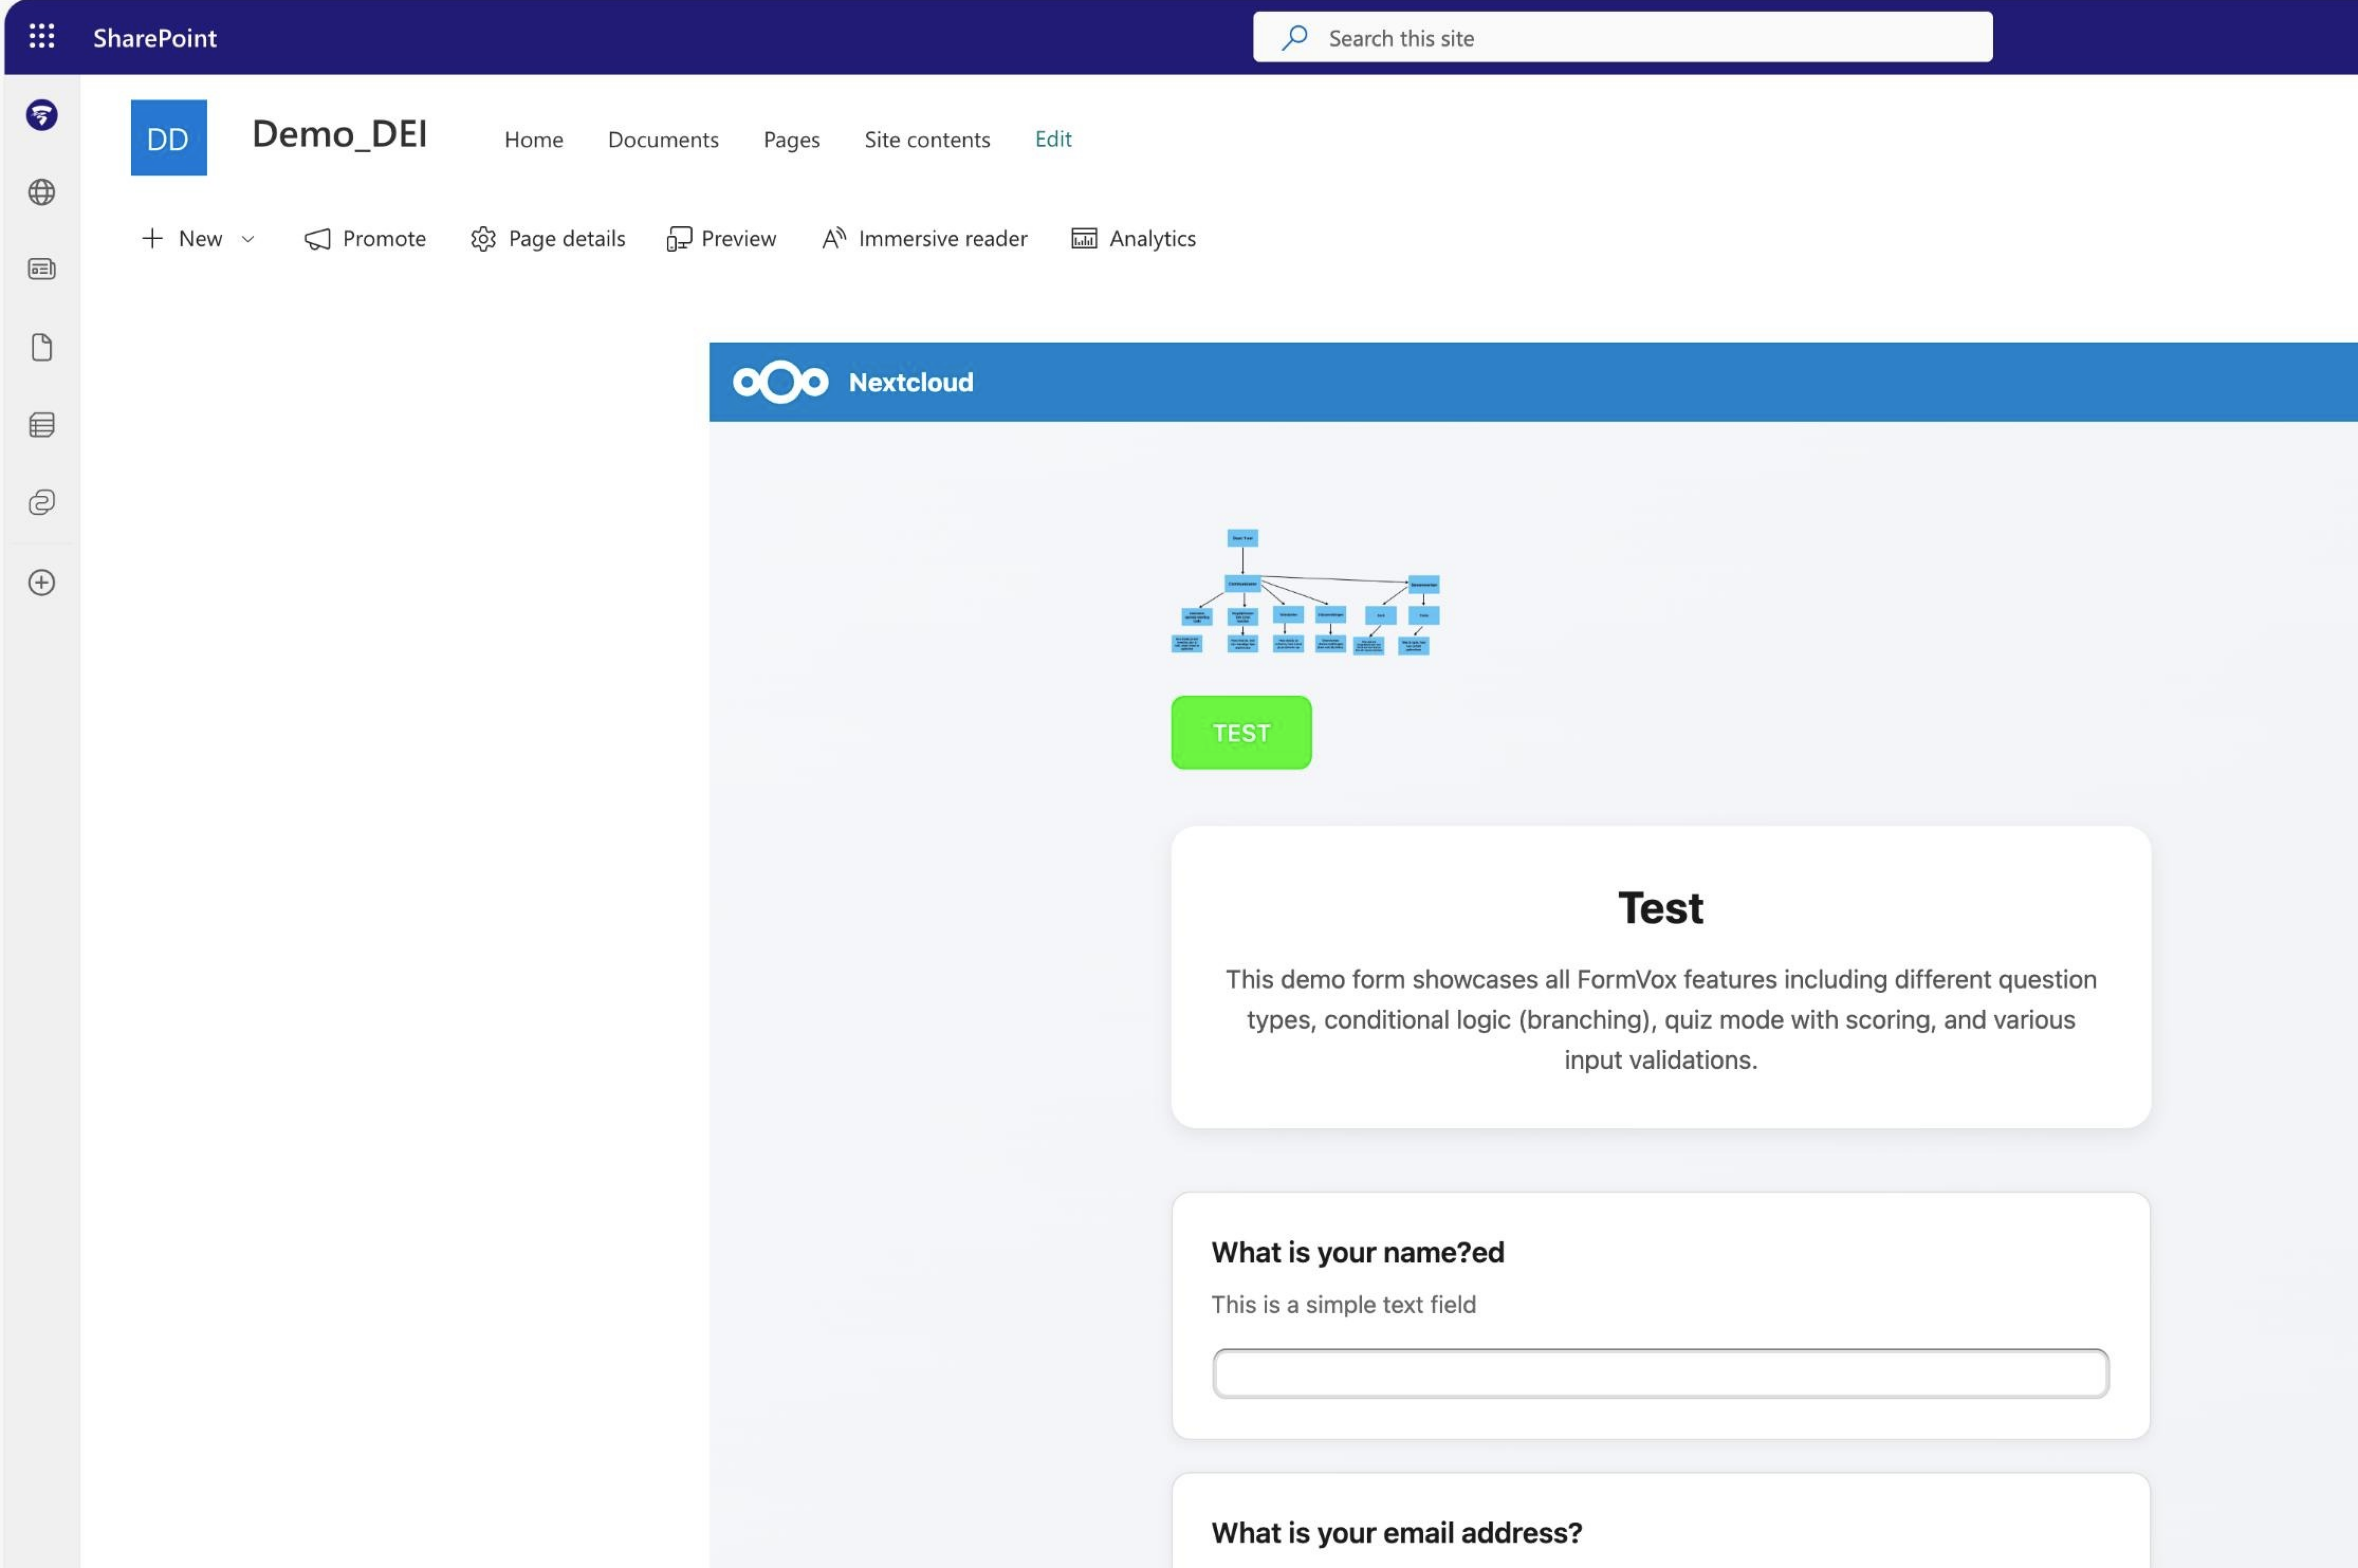 A FormVox form running seamlessly inside a SharePoint site — fully interactive, including all question types, conditional logic, and file uploads.
Because FormVox uses standard iframe embedding, it works anywhere HTML is supported. The embedded form is fully functional: respondents can fill in all question types, navigate conditional logic, upload files, and submit — all without leaving the host page.
Using the Embed Code Generator
The easiest way to embed a form:
- Open your form
- Click Share in the toolbar
- Click the Embed tab
- Configure options:
- Width - Fixed pixels or responsive (100%)
- Height - Frame height in pixels
- Copy the generated embed code
- Paste into your website's HTML
The generator produces ready-to-use code — no manual editing needed.
Manual iframe Embed
If you prefer to write the embed code yourself:
<iframe
  src="https://your-nextcloud.com/apps/formvox/public/FORM_HASH"
  width="100%"
  height="600"
  frameborder="0">
</iframe>
Responsive Embed
For mobile-friendly embedding that adapts to any screen size:
<div style="position: relative; padding-bottom: 75%; height: 0; overflow: hidden;">
  <iframe
    src="https://your-nextcloud.com/apps/formvox/public/FORM_HASH"
    style="position: absolute; top: 0; left: 0; width: 100%; height: 100%;"
    frameborder="0">
  </iframe>
</div>
SharePoint Embedding
To embed a FormVox form in SharePoint:
- Generate the embed code using the Embed tab in the Share dialog
- In SharePoint, edit your page
- Add an Embed web part (or Script Editor)
- Paste the iframe code
- Save and publish the page
The form will appear inline on your SharePoint page, fully styled and interactive.
Domain Restrictions
Administrators can restrict which domains are allowed to embed forms. If embedding doesn't work, contact your Nextcloud administrator to allow your domain.
See Admin Configuration for details.
QR Code
FormVox can generate a QR code for any public form link, making it easy to share forms in print materials, presentations, or on screens.
Generating a QR Code
- Open your form
- Click Share in the toolbar
- Enable a public link (if not already enabled)
- The QR code is automatically generated and displayed in the Share dialog
Downloading the QR Code
- Click Download QR code below the QR code image
- The QR code is saved as a PNG file
- The filename includes the form title for easy identification
Use Cases
- Print on posters or flyers for event registration
- Display on slides during presentations
- Include in email signatures or newsletters
- Place at physical locations (reception desks, classrooms)
File-Based Sharing
Since FormVox stores forms as files, you can also share via:
Nextcloud File Sharing
- Go to the Files app
- Find your
.fvformfile - Share it like any other file
Copy/Move Forms
Copy a form to share a duplicate:
- In Files app, right-click the
.fvformfile - Select Copy or Move
- Choose the destination folder
This creates an independent copy with its own responses.
Collaboration
Multiple Editors
When sharing with edit permissions: - Multiple users can edit the form - Changes are saved automatically - Conflicts are handled by Nextcloud's file locking
View-Only Sharing
For forms with sensitive questions: 1. Share with View permission only 2. Users can see the form structure but not edit 3. They can still submit responses
Best Practices
For Internal Surveys
- Share with Nextcloud groups
- Use user restrictions on public links
- Enable "one submission per user"
For External Surveys
- Use public links
- Add password protection
- Set expiration dates
- Enable rate limiting
For Sensitive Data
- Share only with specific users
- Use password protection
- Review Security settings
Next Steps
- View and analyze Results
- Export your data
- Configure Security settings