Room Management
This guide covers creating, configuring, and organizing rooms in RoomVox.
Room Overview
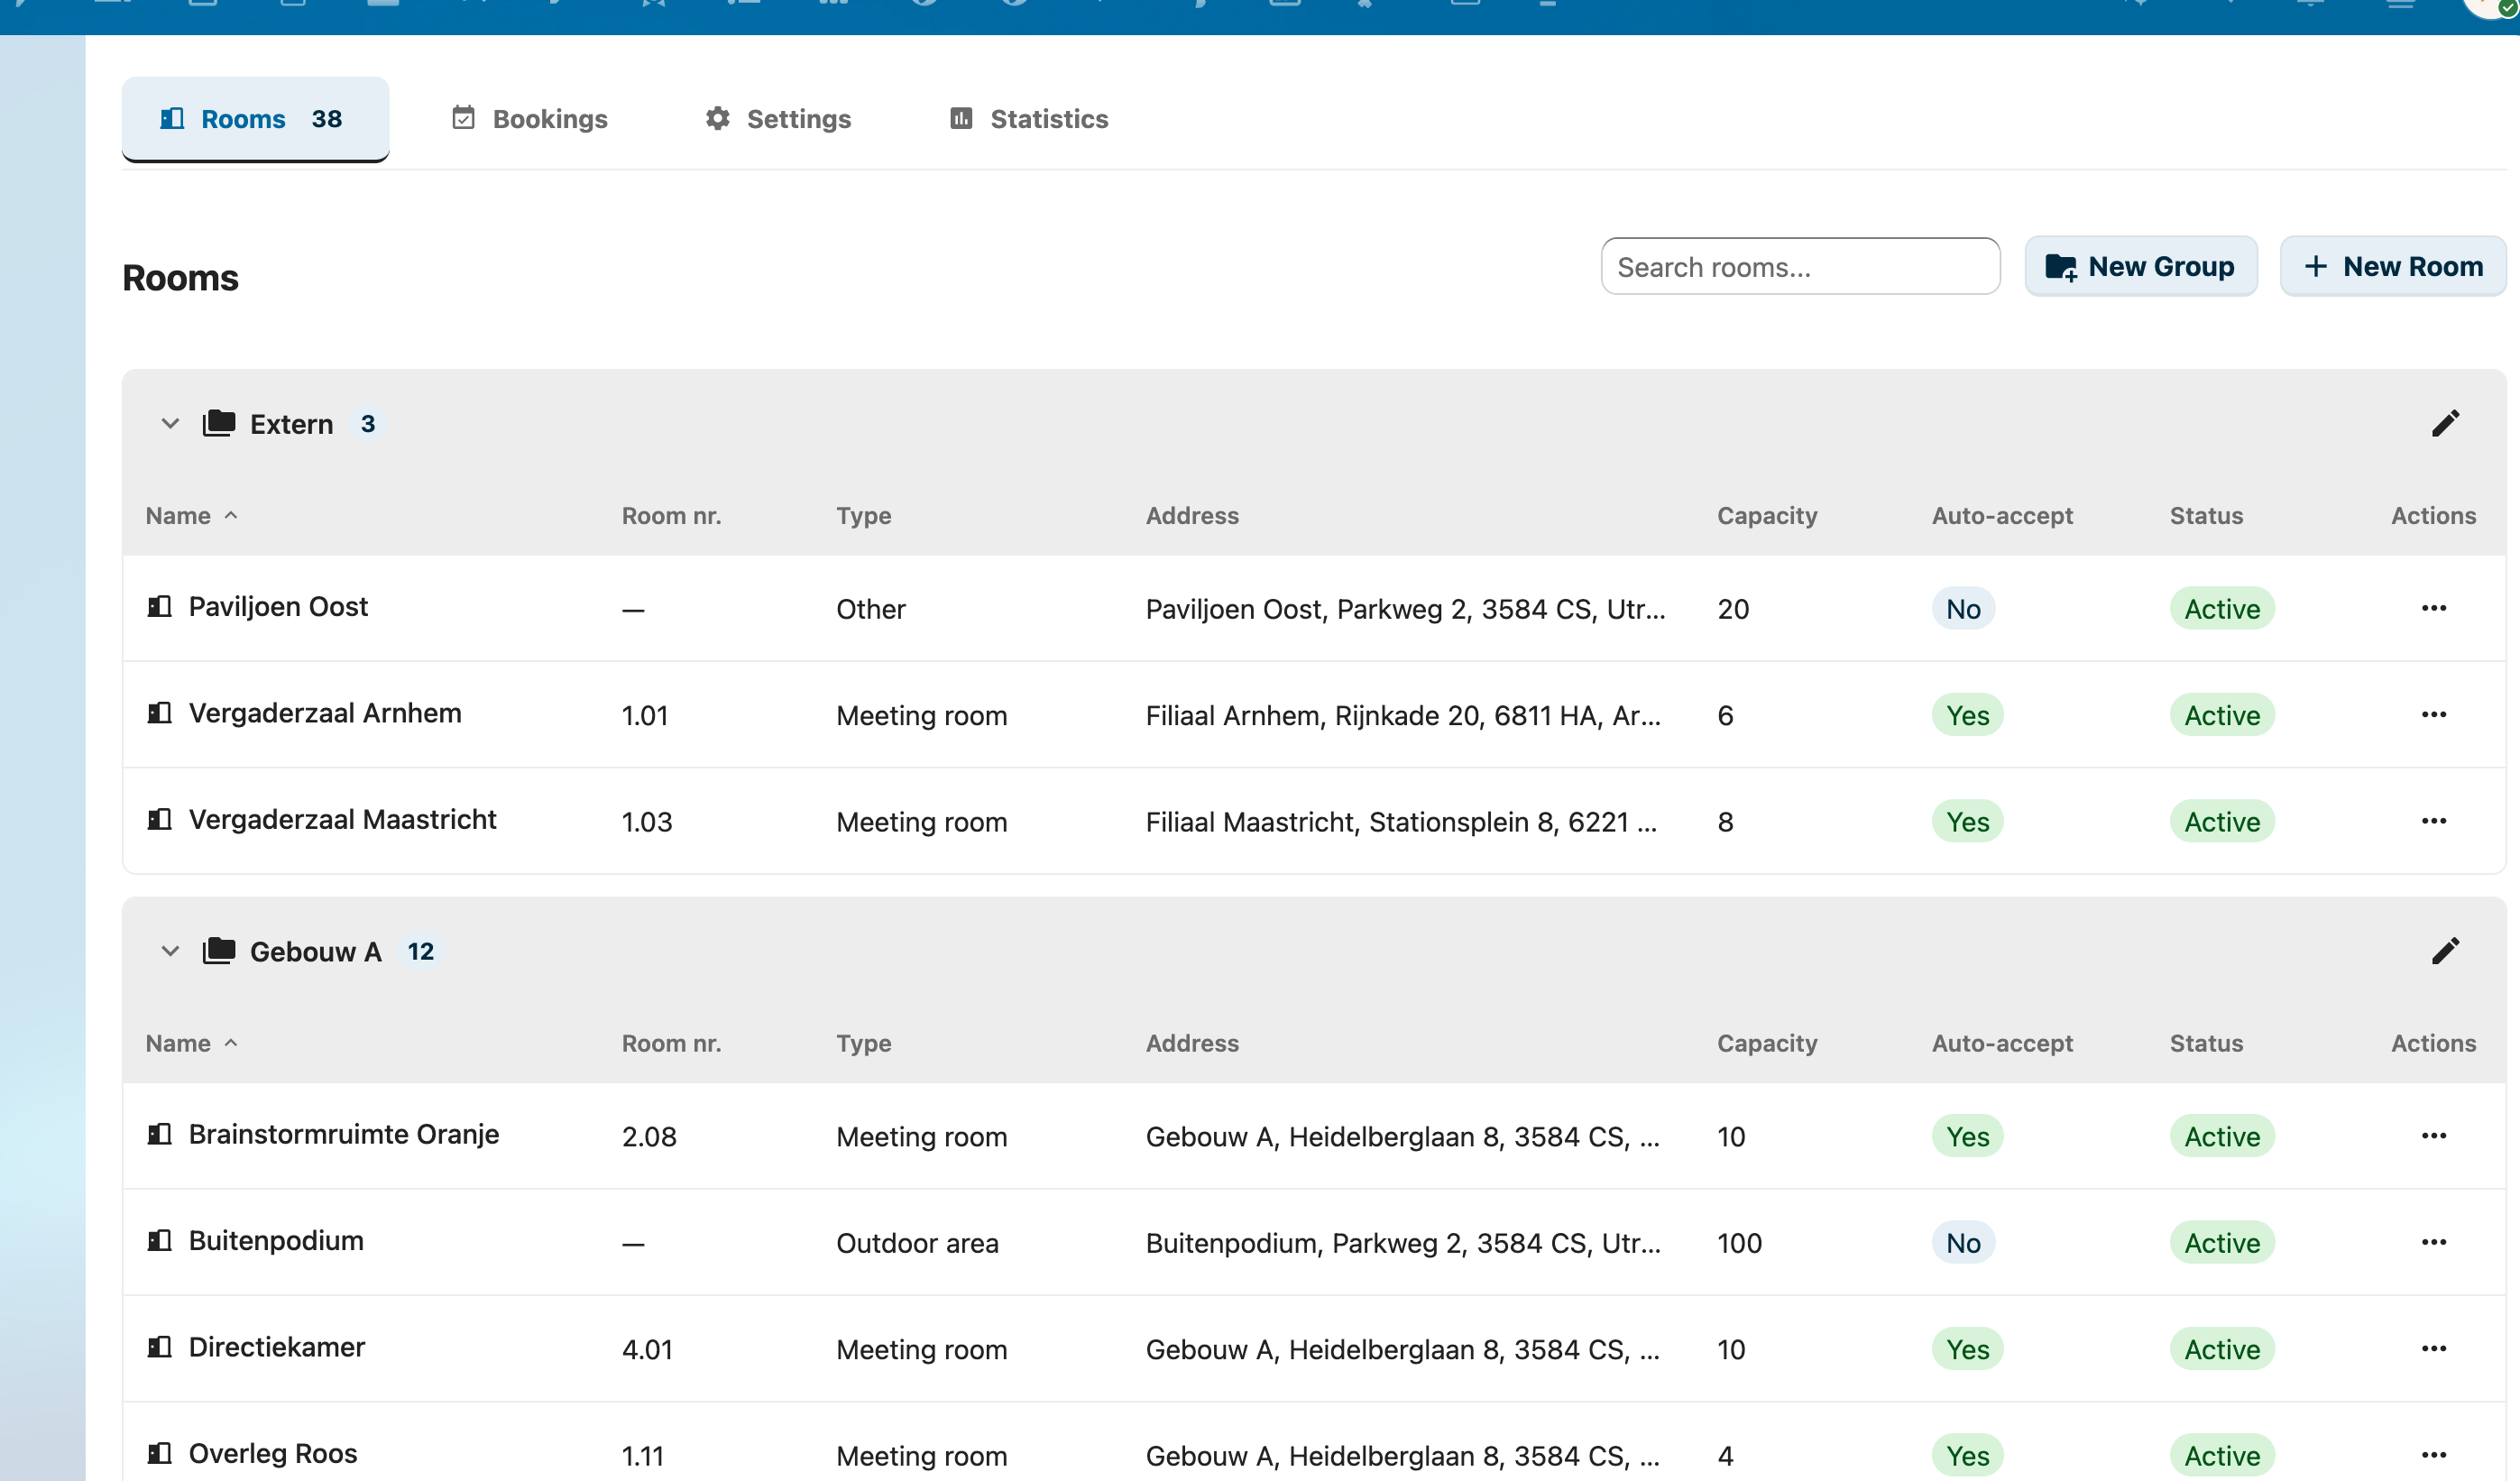
The admin panel has five tabs: Rooms, Bookings, Import / Export, Settings, and Statistics. The Rooms tab shows all rooms organized by group, with columns for name, room number, type, address, capacity, auto-accept status, and active status.
Creating Rooms
- Go to Settings > Administration > RoomVox
- Click the Rooms tab
- Click + New Room
- Fill in the room details and click Create Room
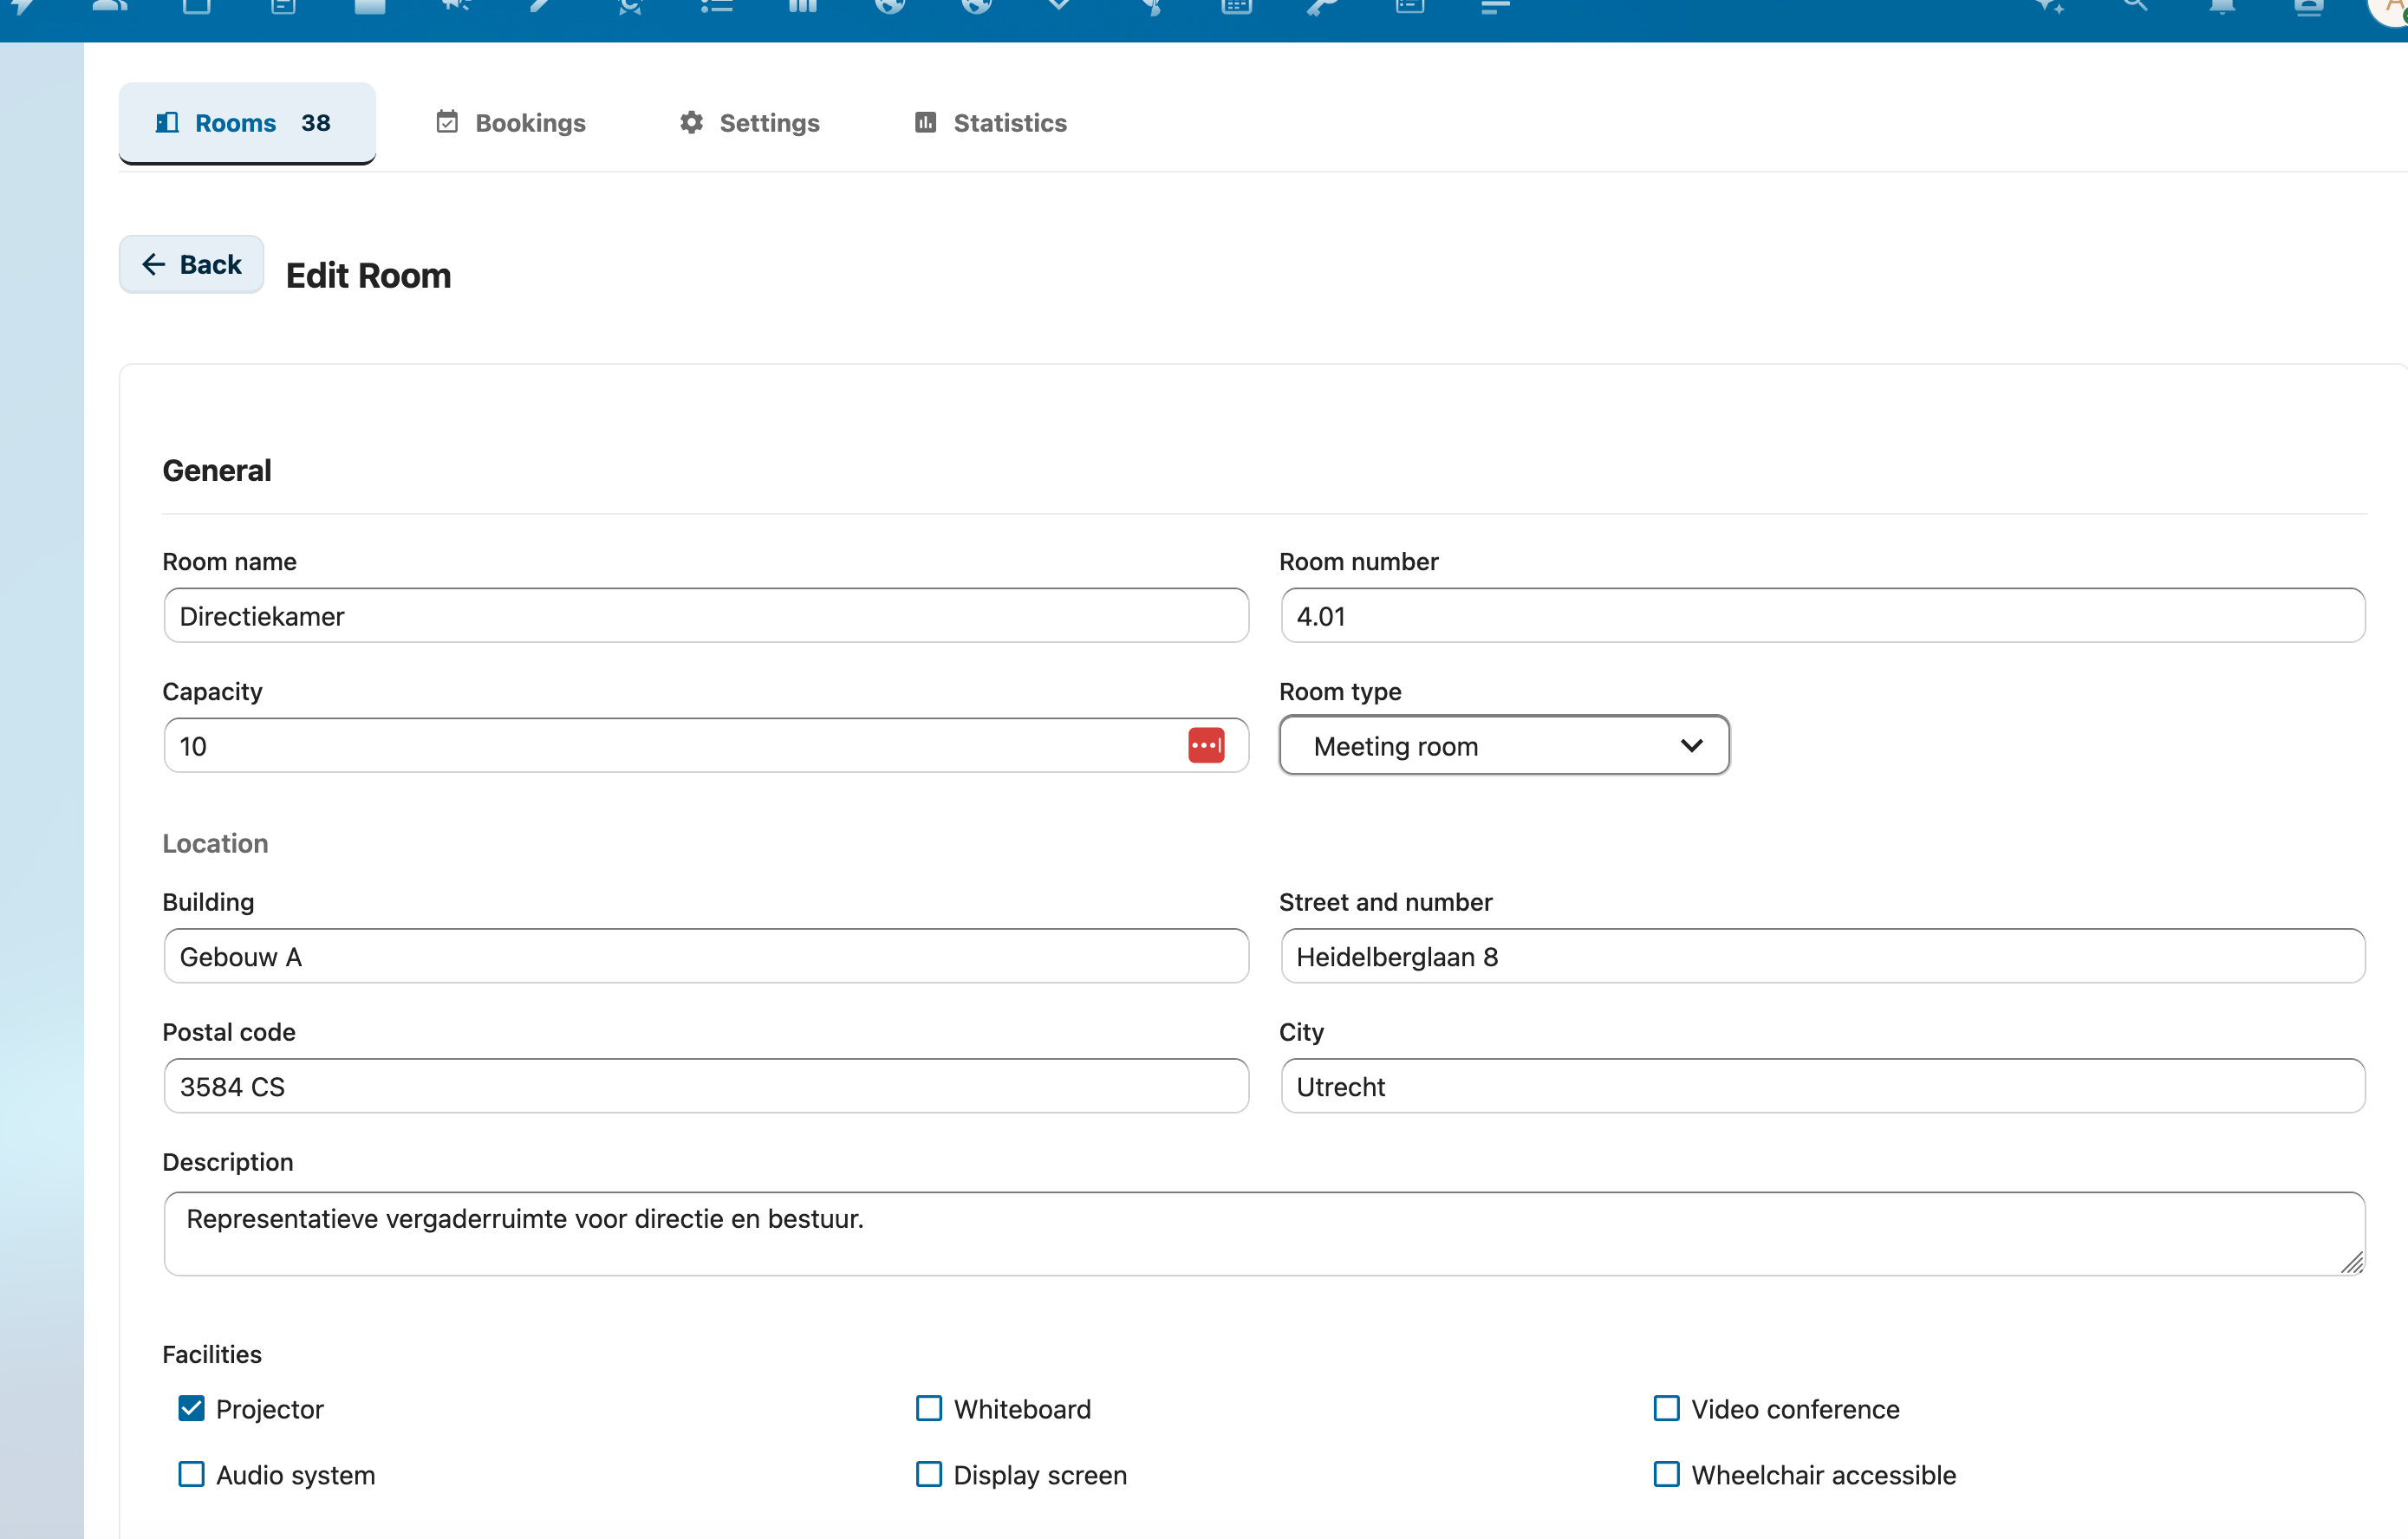
Room Properties
| Field | Required | Description |
|---|---|---|
| Name | Yes | Display name shown in calendar apps (e.g., "Meeting Room 1") |
| Room Number | No | Building/floor identifier (e.g., "2.17" for floor 2, room 17) |
| Capacity | No | Maximum number of people |
| Room Type | No | Category from configured types (meeting room, studio, etc.) |
| Address | No | Building name, street, and city — displayed as location. Stored as a 4-part comma-separated string (Building, Street, Postal code, City), with empty parts preserved so partial addresses round-trip correctly |
| Description | No | Additional information about the room (admin/manager-only) |
| Responsible contact | No | Free-text contact info (e.g. Anne Janssen (anne@voxcloud.nl) or Ask building manager). Visible to every user with view-permission in Settings → Personal → RoomVox → My Rooms, so viewers know who to approach when they cannot book a room themselves. Max 255 characters |
| Facilities | No | Available equipment (projector, whiteboard, video conferencing, etc.) |
| No | Custom email address for the room (see below) | |
| Room Group | No | Assign room to a group for shared permissions |
Room Email Address
Each room has an email address used for two purposes:
-
CalDAV scheduling — The address used when the room is added as an attendee. If no custom email is set, RoomVox generates an internal address (
<room-id>@roomvox.local). -
Notification sender — If the room has a real external email address (e.g.,
room1@company.com), notifications are sent from that address. Internal@roomvox.localaddresses fall back to the Nextcloud system sender.
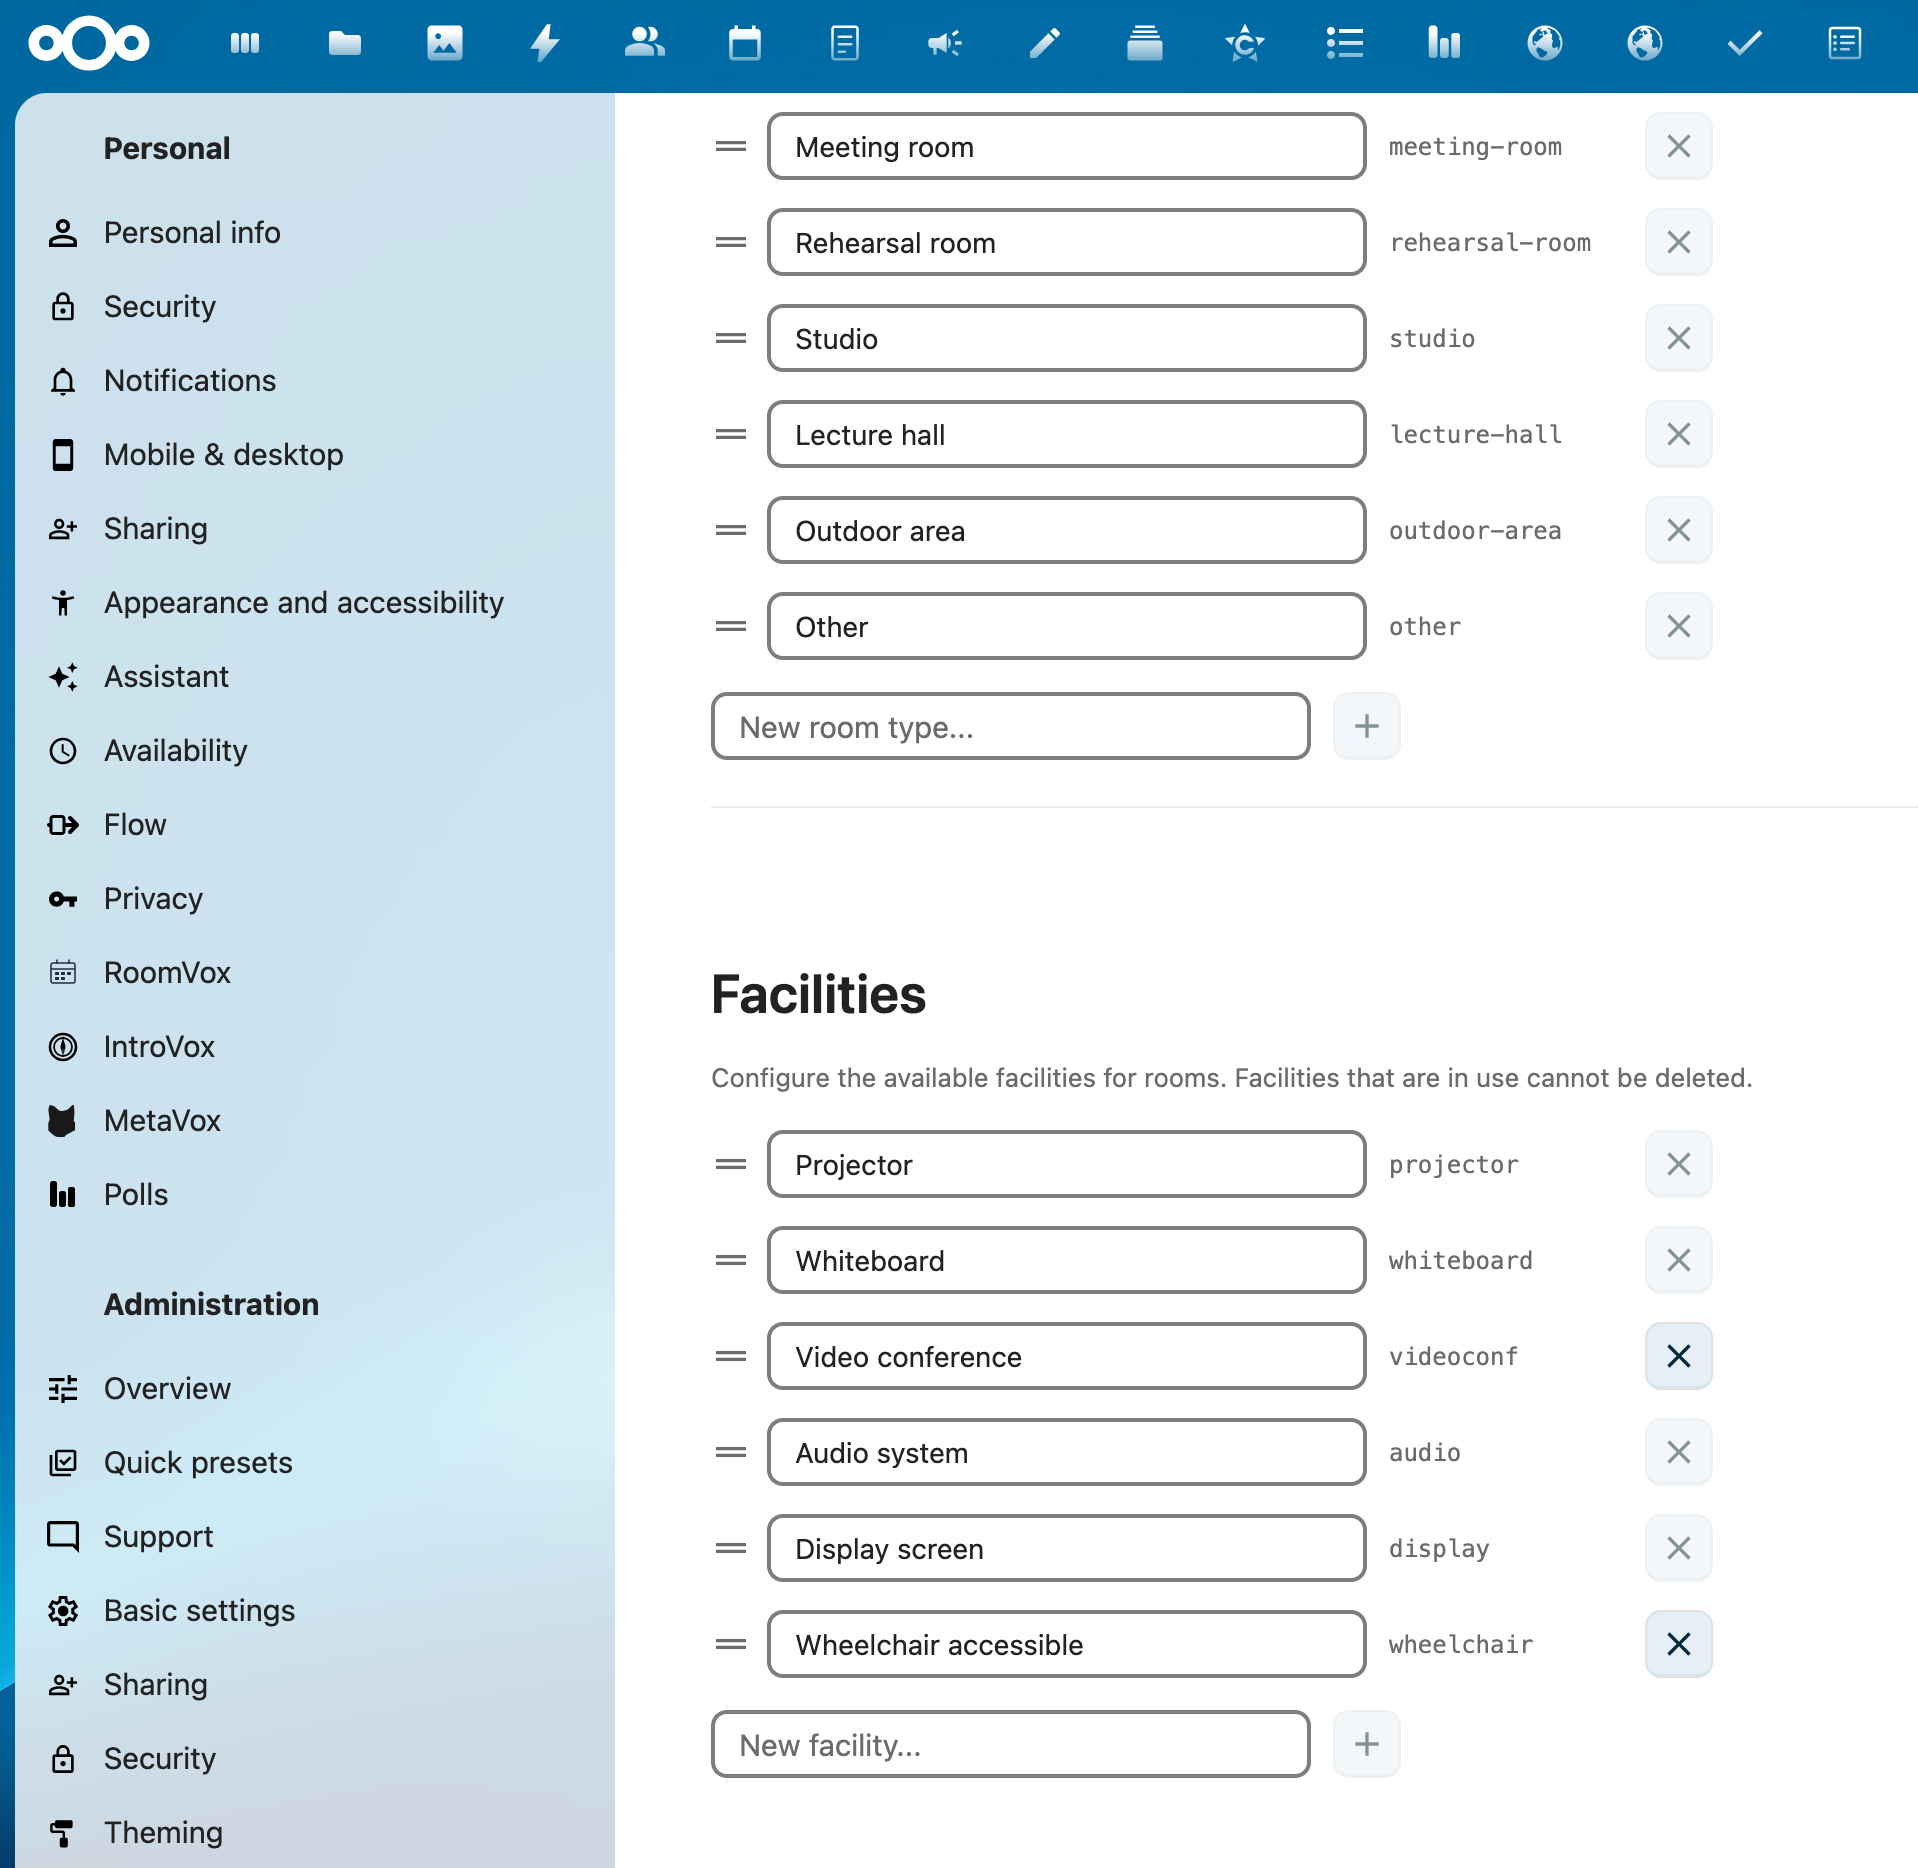
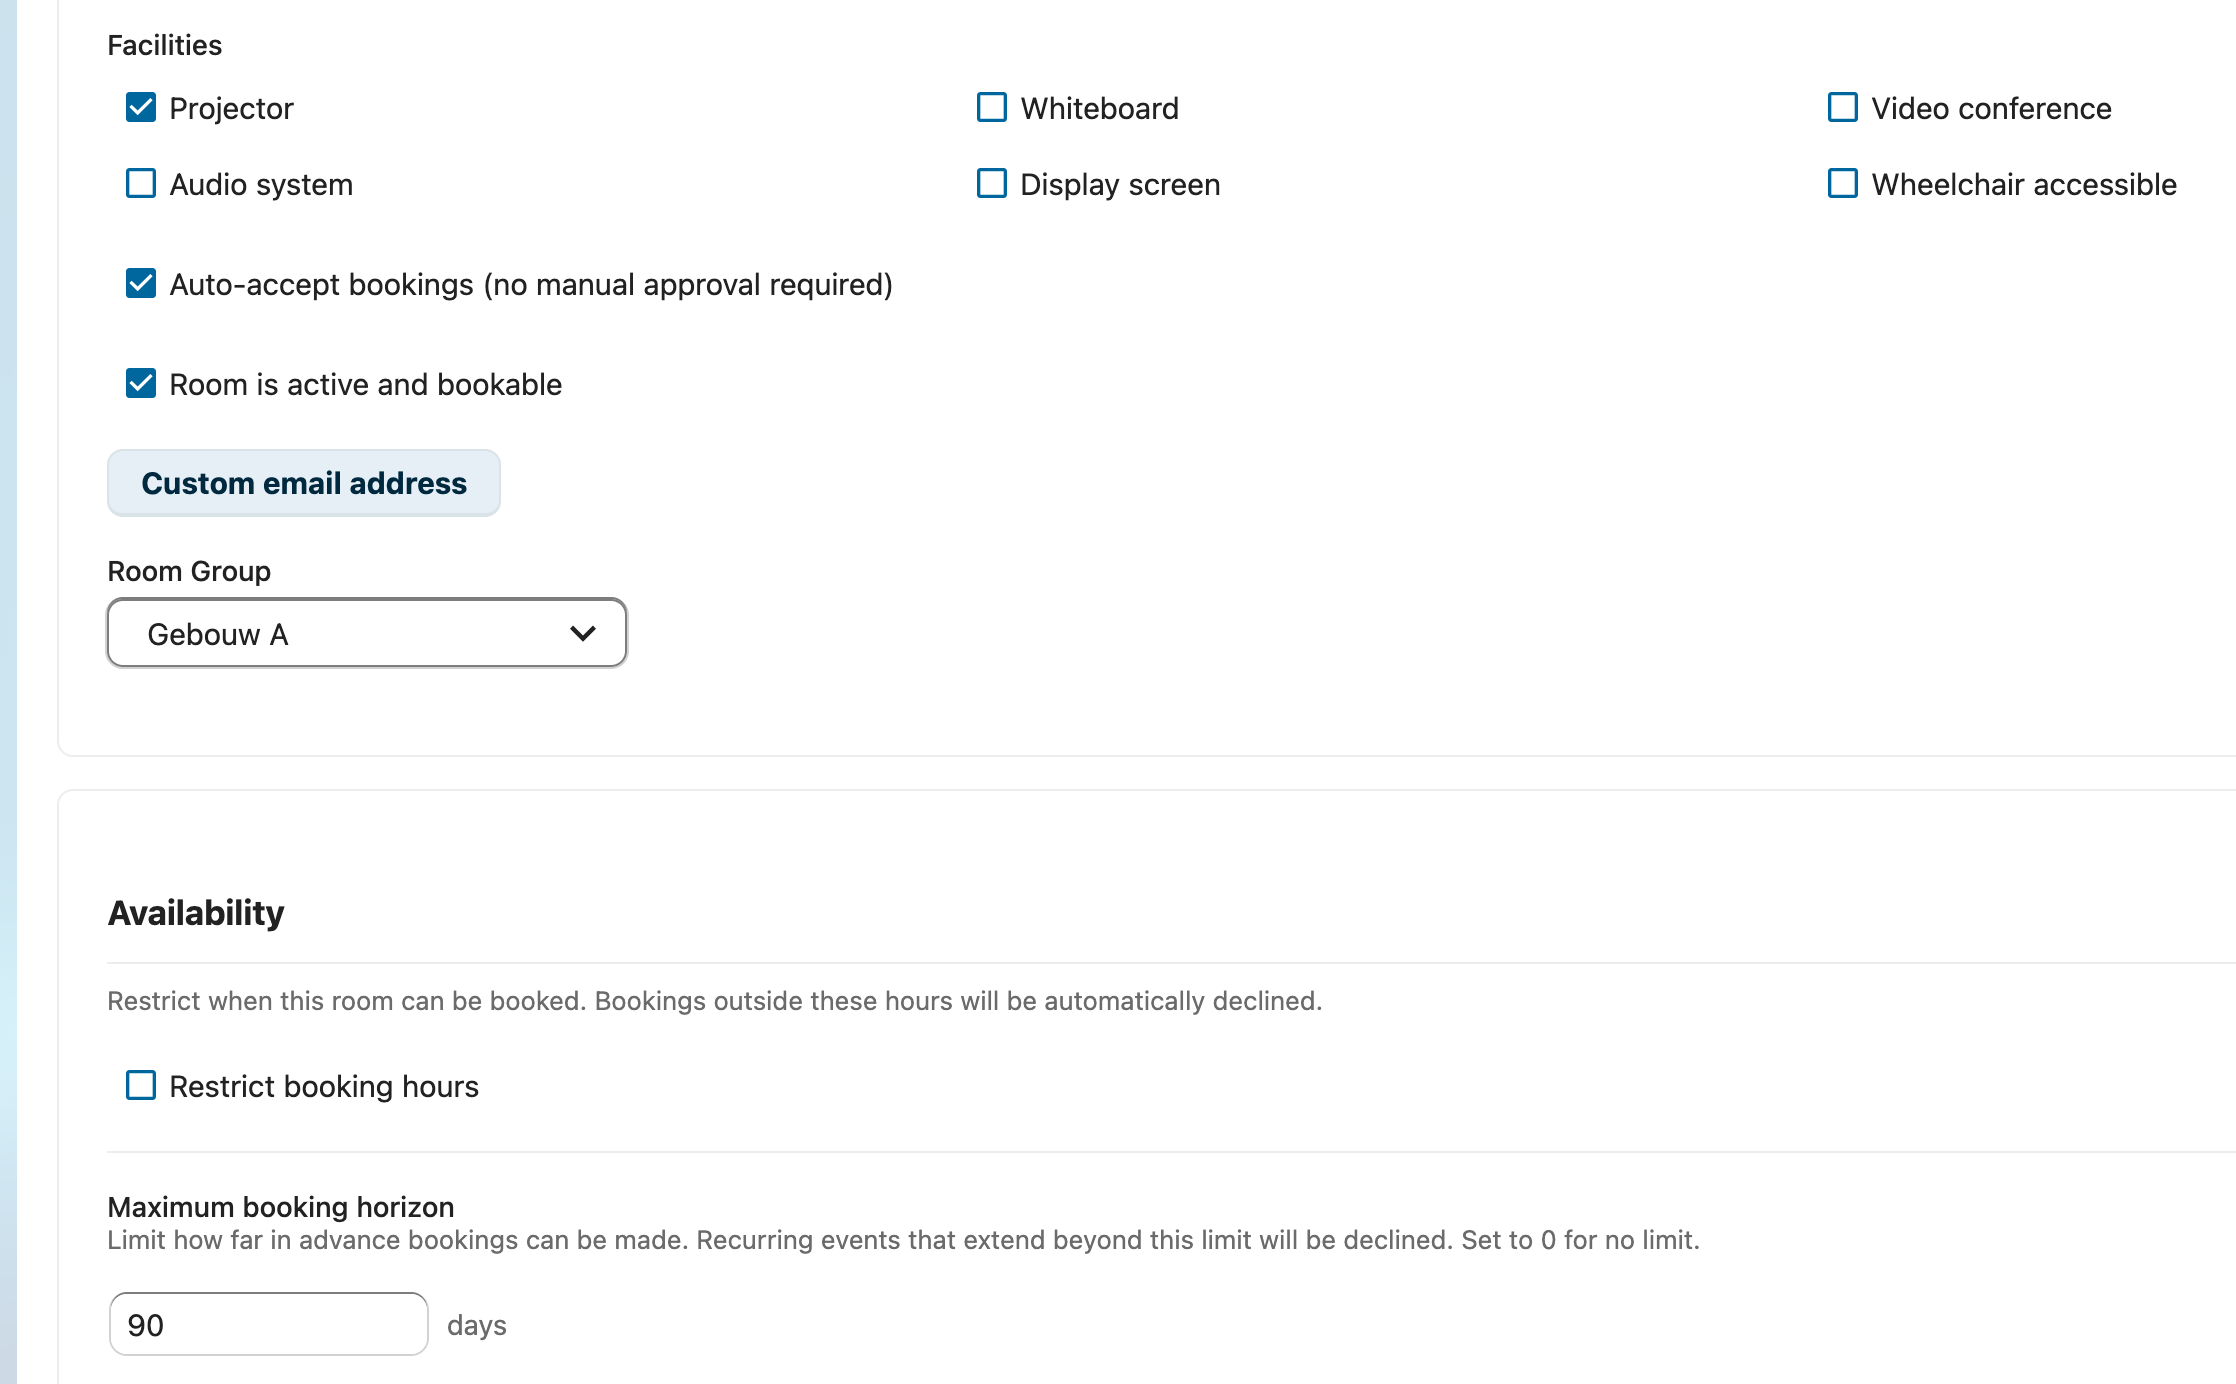
Facilities
Available facility checkboxes:
- Projector
- Whiteboard
- Video conferencing
- Audio system
- Display/screen
- Wheelchair accessible
These are published as CalDAV room features and can be used for filtering in the calendar patch room browser.
Booking Behavior
Auto-Accept
When enabled, bookings are automatically confirmed if there are no conflicts. When disabled, bookings are set to tentative (pending) and require manager approval.
Configure per room, or set the default in Settings > Default auto-accept.
Availability Rules
Restrict when rooms can be booked:
- In the room editor, enable Restrict booking hours
- Add one or more rules:
- Days — select which days of the week (Monday through Sunday)
- From/To — time window for each day
- Use presets for common patterns:
- Weekdays 08–18 — Monday to Friday, 8:00 AM to 6:00 PM
- Weekdays 09–17 — Monday to Friday, 9:00 AM to 5:00 PM
Bookings outside these rules are automatically declined.
Show/Hide Weekends
Control whether weekends are visible in the booking calendar:
- Go to Settings > Administration > RoomVox
- Click the Settings tab
- Toggle Show weekends in calendar on or off
This setting affects the calendar display only. To prevent weekend bookings, use Availability Rules with weekday-only days instead.
Maximum Booking Horizon
Limit how far in advance rooms can be booked:
- Set the number of days (e.g., 90 = max 3 months ahead)
- Set to 0 for no limit
- Recurring events are checked against their last occurrence
Room Status
Active / Inactive
Rooms can be activated or deactivated:
- Active — room appears as a CalDAV resource and can be booked
- Inactive — room is hidden from calendar apps but configuration is preserved
Toggle the Active switch in the room editor.
Deleting Rooms
To permanently delete a room:
- Click the Delete button in the room editor
- Confirm deletion
This removes: - The room configuration - The room's CalDAV calendar and all bookings - The room service account - Room permissions
Room Types
Room types help categorize your rooms. They're shown in the room list and published as CalDAV metadata.
Managing Types
- Go to Settings tab in the admin panel
- Find the Room Types section
- Add, edit, or remove types
- Drag to reorder
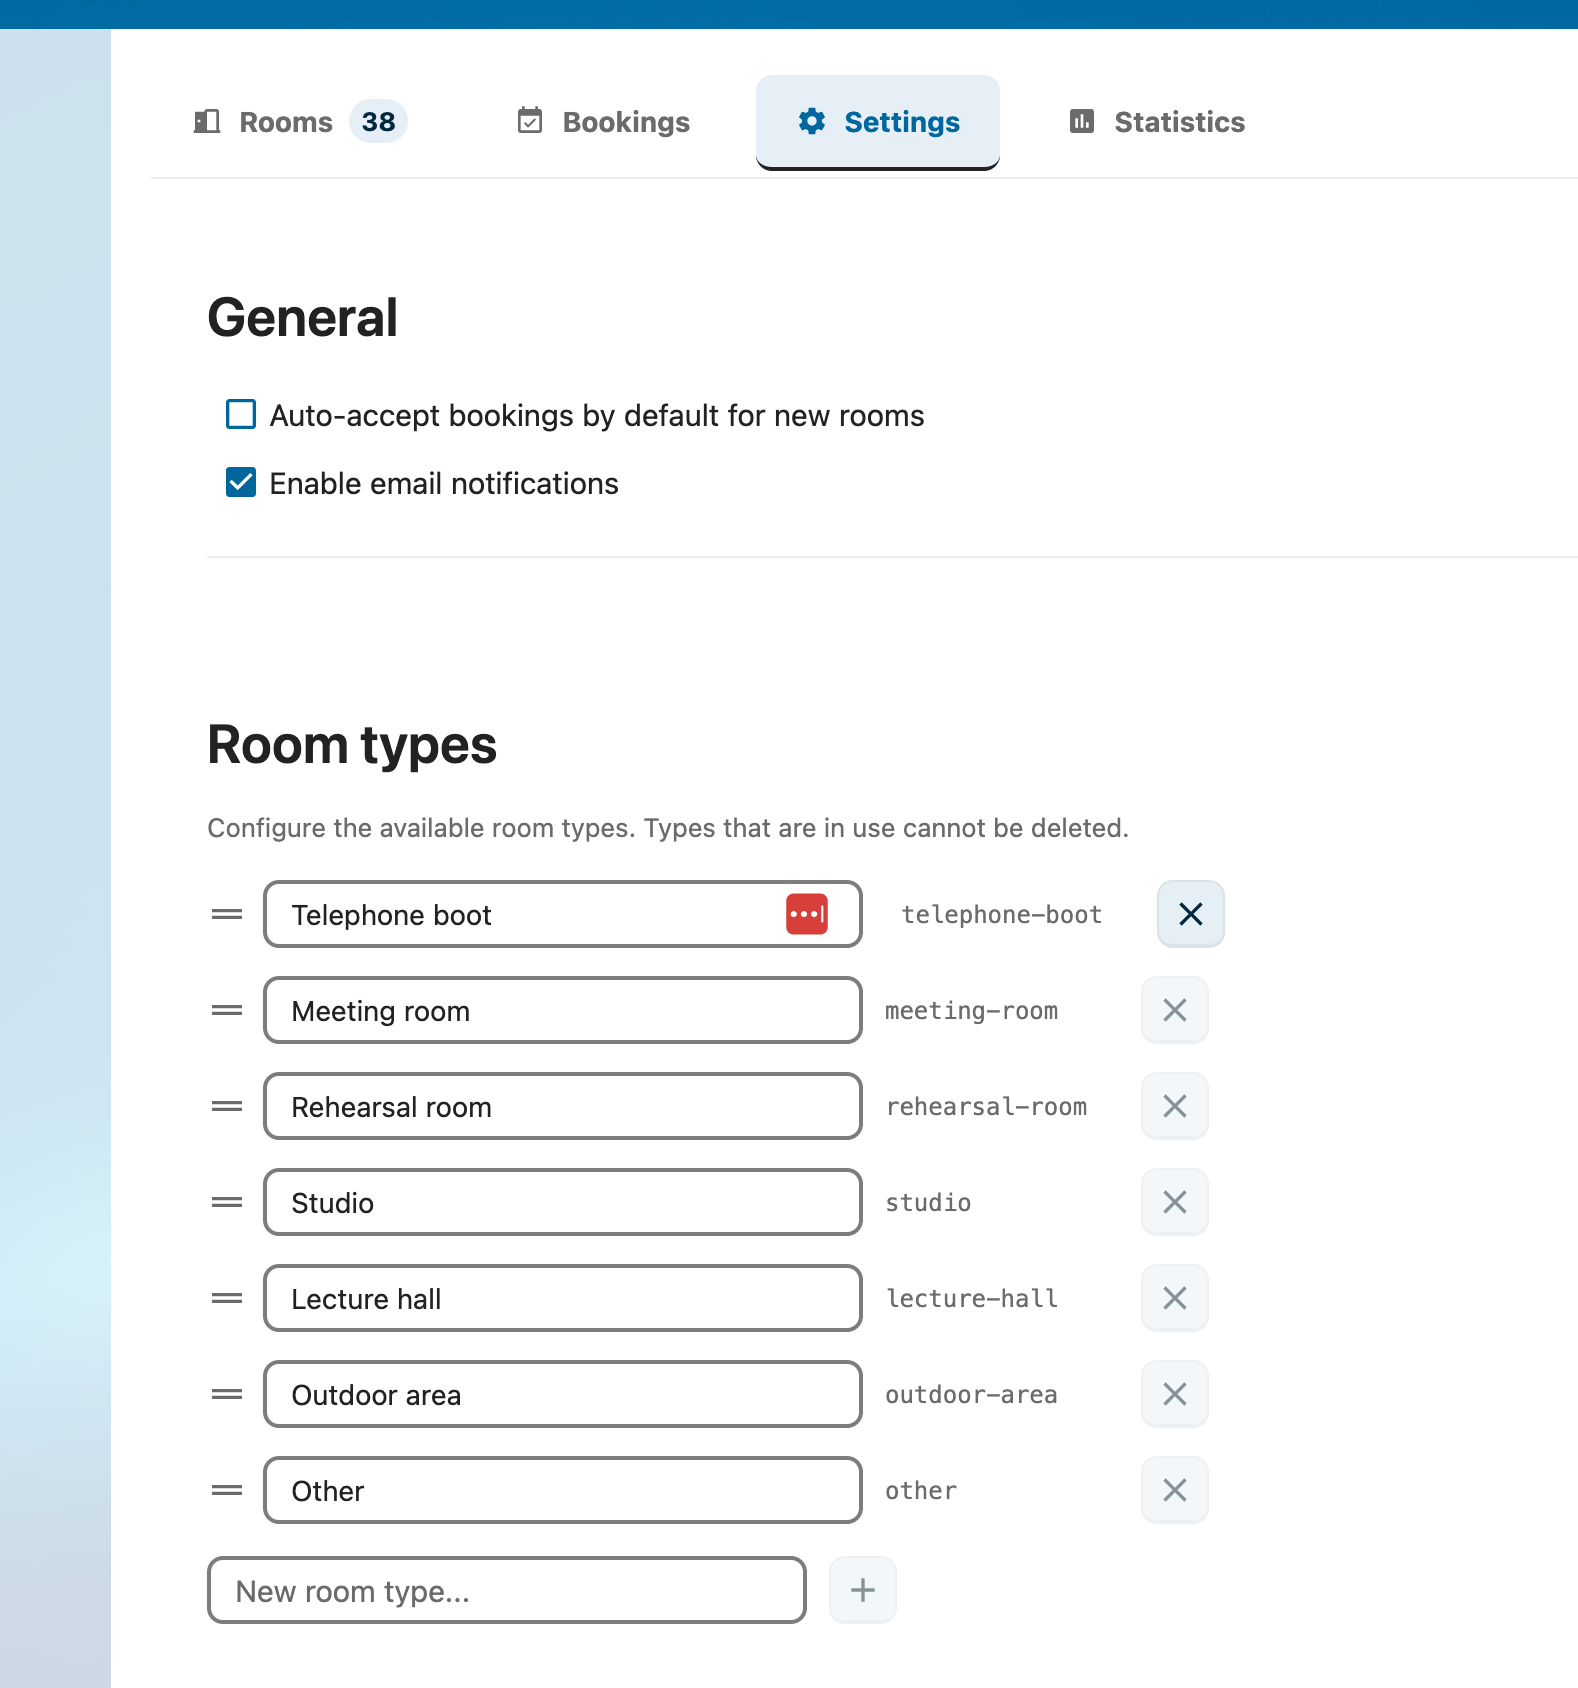
Default Types
- Meeting Room
- Rehearsal Room
- Studio
- Lecture Hall
- Telephone Booth
- Outdoor Area
- Other
Room Groups
Room groups let you organize rooms and share permissions across multiple rooms.
Creating a Group
- In the room list, click Manage groups
- Click Add group
- Enter a name and optional description
- Click Save
Assigning Rooms to Groups
When editing a room, select a Room Group from the dropdown. The room inherits permissions from the group (merged with its own room-level permissions).
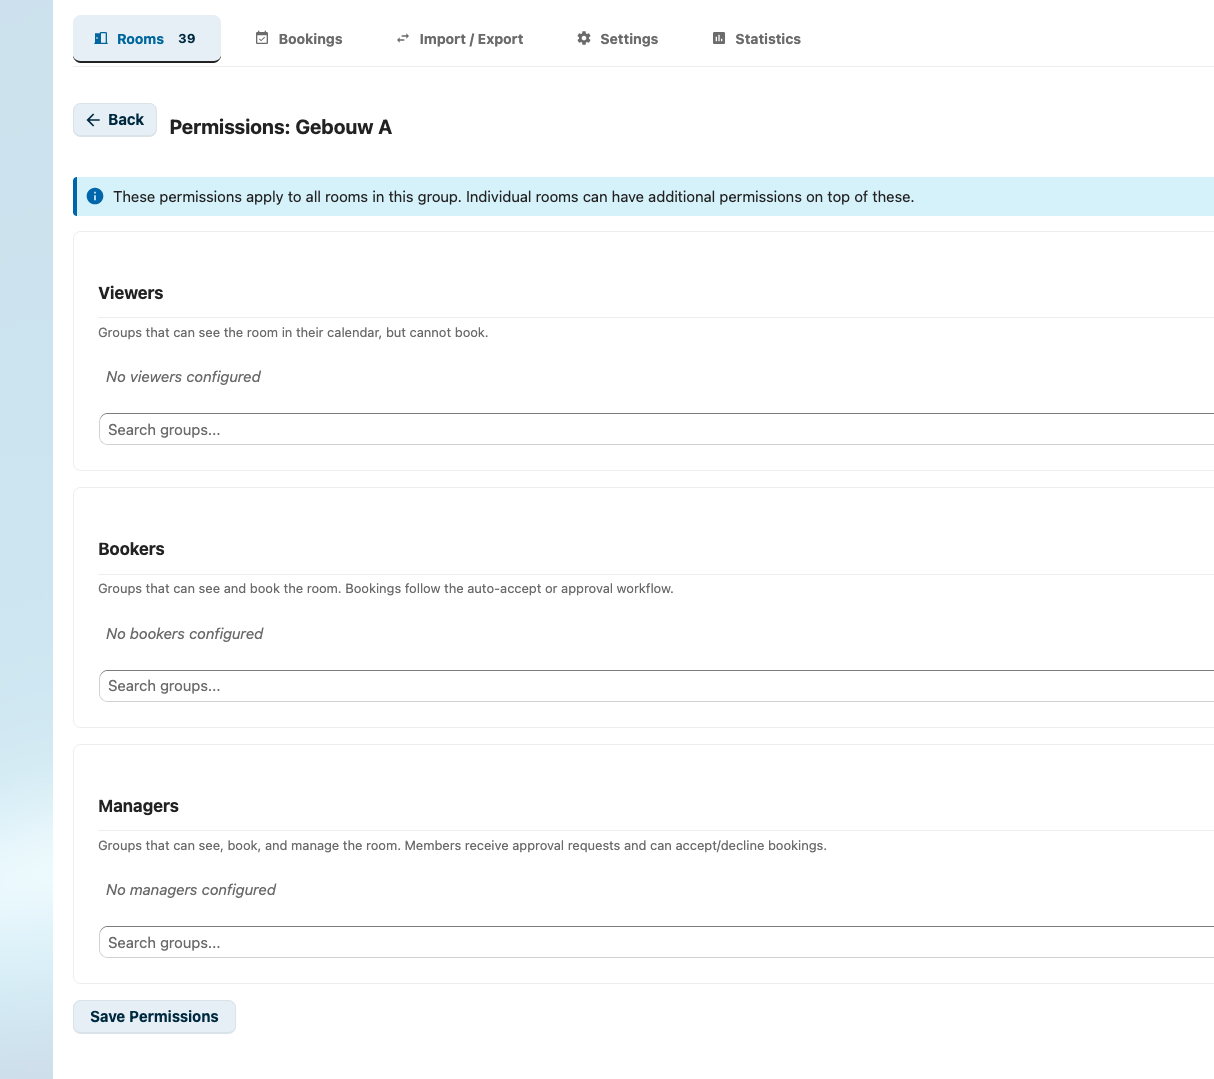
Group Permissions
Set permissions at the group level to apply them to all rooms in the group:
- Click the permissions icon on the group
- Add viewers, bookers, and managers using the search fields
- Click Save Permissions
- These permissions are merged (union) with each room's individual permissions
Deleting Groups
Groups can only be deleted when no rooms are assigned to them. Move or unassign all rooms before deleting.
Per-Room SMTP
Each room can have its own SMTP server for sending notifications. See Email Configuration for details.
Configuration
In the room editor, expand the SMTP Configuration section:
| Field | Description |
|---|---|
| Host | SMTP server hostname (e.g., smtp.company.com) |
| Port | SMTP port (default: 587) |
| Username | SMTP authentication username |
| Password | SMTP authentication password (encrypted with ICrypto) |
| Encryption | TLS, SSL, or None |
Testing
Click Send test email to verify the SMTP configuration. Enter a recipient email address and check if the test email arrives.