Creating Forms
This guide explains how to create, edit, and manage forms in FormVox.
Creating a New Form
From the FormVox App
- Open FormVox from the Nextcloud navigation bar
- You'll see the template gallery on the homepage
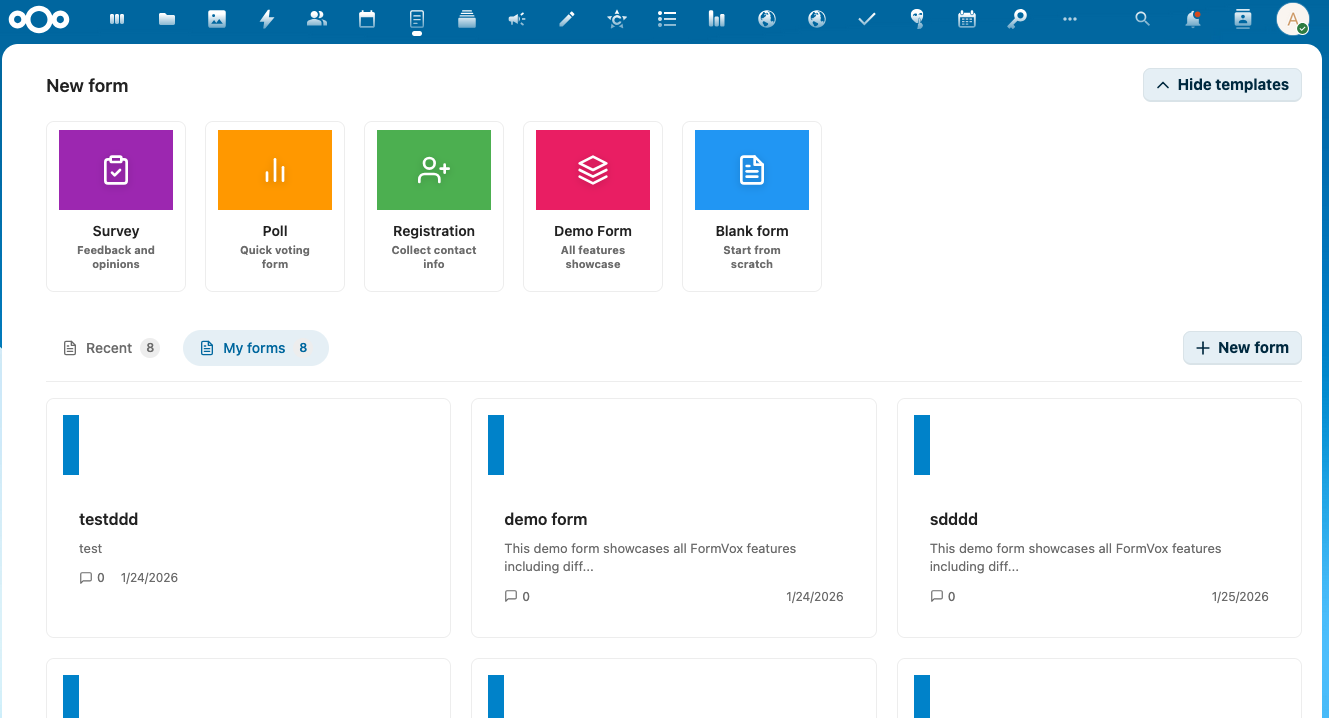
- Click on a template card to create a new form:
- Blank - Empty form to build from scratch
- Survey - Pre-configured with common survey questions
- Poll - Simple voting form
- Registration - Event registration template
-
Demo - Example form showcasing all features
-
In the dialog, configure your form:
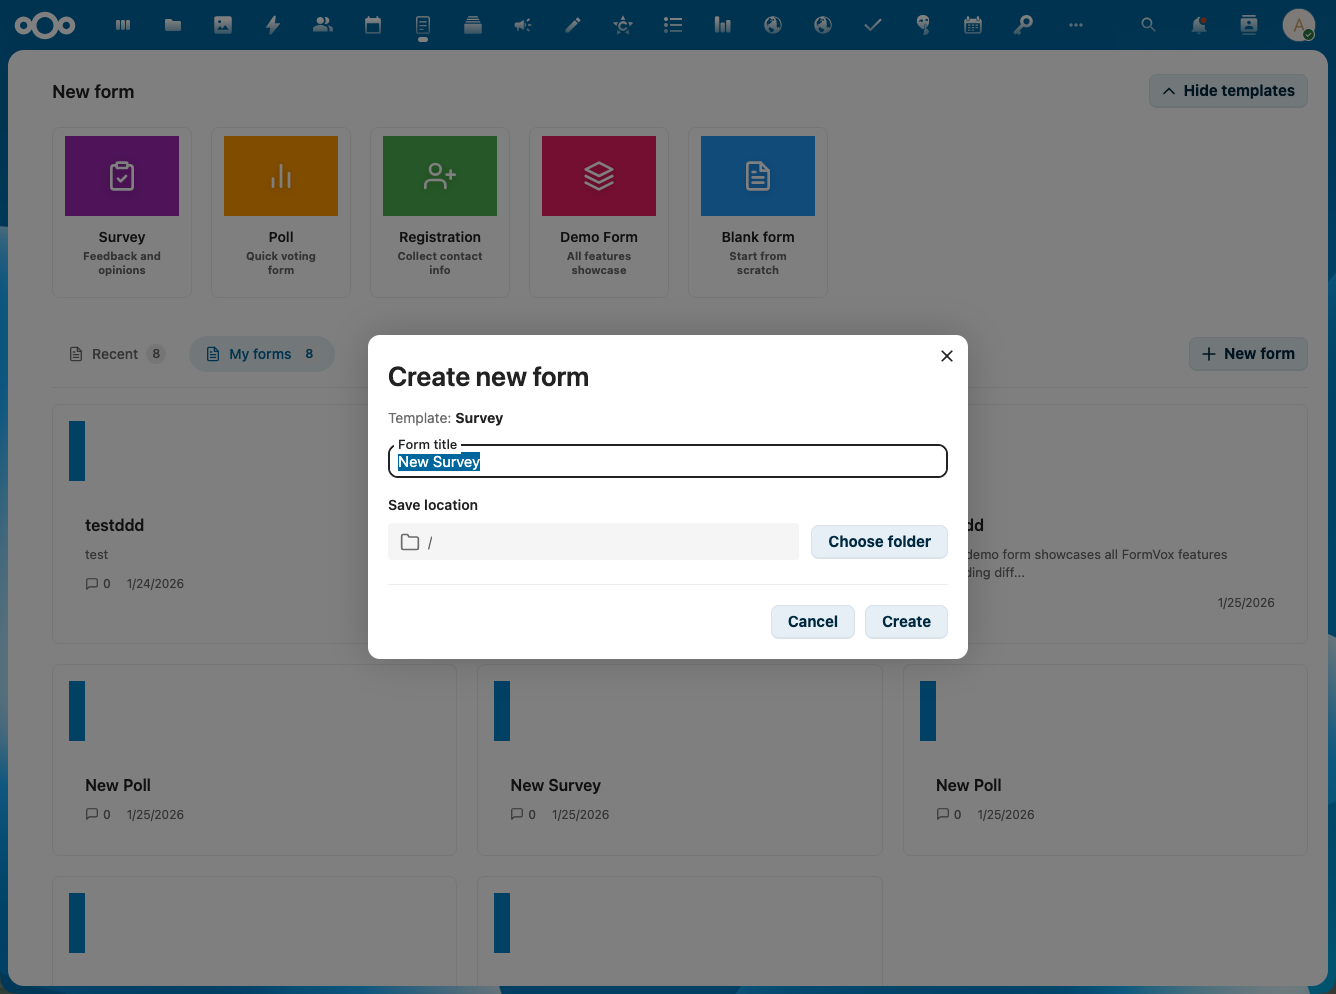
- Title - Name of your form
-
Location - Folder where the .fvform file will be saved
-
Click Create to open the form editor
From the Files App
You can also create forms directly from Nextcloud Files:
- Navigate to the folder where you want to create the form
- Click the + button
- Select New form
- Enter a name and click Create
The Form Editor
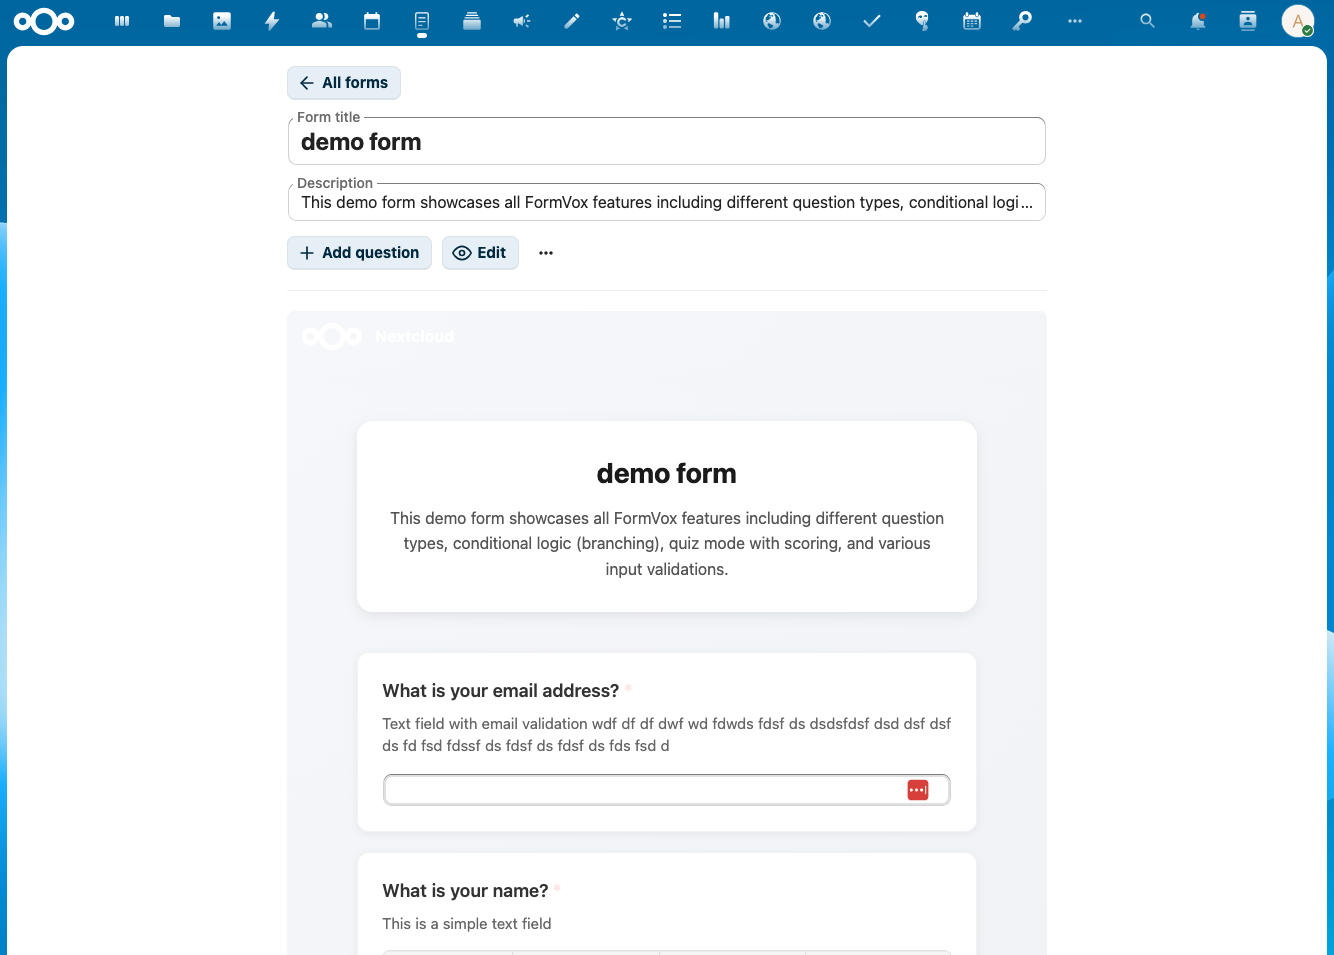
The form editor is divided into three sections:
Left Sidebar - Question List
- View all questions in your form
- Drag and drop to reorder questions
- Click a question to edit it
Center - Question Editor
- Edit the selected question
- Configure question text and options
- Preview how the question will look
Right Sidebar - Settings
- Question settings (required, description, etc.)
- Form settings (title, description, branding)
- Submission settings
Adding Questions
- Click Add question or the + button
- Choose a question type from the dropdown
- Enter your question text
- Configure options based on the question type
See Question Types for details on each type.
Editing Questions
Reordering Questions
- Drag and drop questions in the left sidebar
- Or use the up/down arrows on each question
Duplicating Questions
- Click the duplicate icon on a question
- A copy will be created below the original
Deleting Questions
- Click the delete icon on a question
- Confirm the deletion
Form Settings
General Settings
- Title - The form title shown to respondents
- Description - Optional description shown at the top of the form
Submission Settings
- Allow multiple submissions - Let users submit multiple times
- Show progress bar - Display progress on multi-page forms
- Confirmation message - Custom message after submission
Branding
- Header image - Add a logo or banner
- Background color - Customize the form appearance
- Button color - Match your organization's colors
Multi-Page Forms
For longer forms, you can organize questions into pages:
- Click Add page in the question list
- Drag questions into the new page
- Respondents will see a "Next" button between pages
Collaborative Editing
When multiple users have edit access to a form, FormVox shows who else is currently editing.
Presence Indicators
- Avatar icons appear in the editor toolbar showing other active editors
- Presence is detected automatically via heartbeat polling (every 30 seconds)
- Editors who have been inactive for more than 60 seconds are removed from the list
How It Works
- Open a form that is shared with edit permissions
- If other users are also editing, their avatars appear in the toolbar
- A count badge shows when many editors are active (e.g., "3 others editing")
Draft Autosave
FormVox automatically saves respondents' progress when filling in a form, so they can resume later if they close the browser or navigate away.
How It Works
- Answers are saved to the browser's localStorage as the respondent fills in the form
- If a respondent returns to the same form, a "Welcome back!" banner appears
- They can choose Continue to resume where they left off, or Start over to begin fresh
- Drafts are automatically cleared after successful submission
- Drafts expire after 7 days of inactivity
Notes
- Drafts are stored per browser — switching browsers or devices starts a new session
- Clearing browser data removes saved drafts
- This works on both public and authenticated forms
Saving Your Form
Forms are automatically saved as you edit. The form file (.fvform) is stored in the location you specified when creating the form.
Next Steps
- Learn about all Question Types
- Add Conditional Logic to your forms
- Share your form with others